As you know Final Cut Pro 7 doesn’t support AVCHD/MTS files
natively. There are few ways to get them in Final Cut Pro 7.
1.
With Log
and Transfer tool in FCP
IMPORTANT: You should keep SD card folder structure
to be able to import files. You should
copy and keep all folders from your card or camera, not only folders with .MTS
files. That is how file structure looks
in Sony cameras:
1. Open FCP 7 and choose File => Log and
Transfer or press Shift + Cmd+ 8)
2. Add your card - show main card folder
3. You’ll see the list of clips. Choose
clips you want to import into FCP 7.
4.
Additionally you can change the way your clips will be named so they
will contain creation date, card name, your custom words or other information.
5. Check your preferences. You can change
to what type of Pro Res your files will be converted - ProRes HD, LT, Proxy…
6. Add files to conversion queue
7. Your clips will appear in currently open
project. Clip location on disk is your Capture Scratch Folder (Final Cut Pro=> System Settings =>
Capture)
2.
If for different reasons Log and Transfer doesn’t work for you then you have to use a
standalone converter. I use Sorenson Squeeze but it could be any other. Unfortunately,
MPEG Streamclip nor Compressor can’t do it.
With Sorenson
Squeeze you have no need to keep file structure (and corrupted folder
structure is one of the often reason why Log and Transfer option is
unavailable). Disadvantage of this
method is that Sorenson doesn’t join long clips
If your Sorenson is freshly installed,
before you start conversion check Preferences.
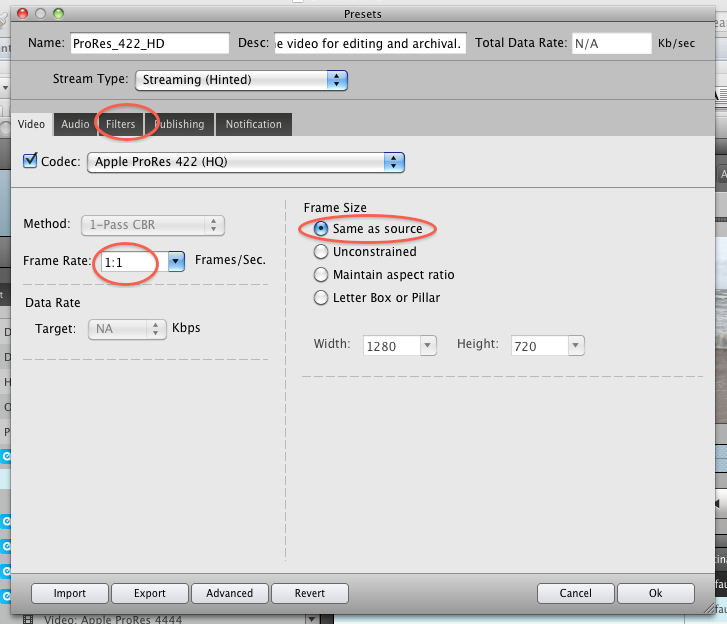
In “Advanced” tab uncheck Add global filter
– usually you don’t want any filters to be applied to every conversion you
do.
To convert multiple files:
1. Open Sorenson Squeeze.2. If you want to convert only few files, you can drag them directly to conversion queue.
If you have a lot of files (like the whole card) then use Watch folder: Put all your .MTS files into one folder. Then click Watch folder and choose your folder with .MTS files. You’ll see you watch folder in conversion queue
3. Add a job from template. If you have fresh installation double click on Pro Res settings and check if the image is “Same as source” and there are no filters added (only in case you want some).

4. Drag ProRes settings on your clips or watch folder. If you drag it on Job word it will create “Global setting” and will be applied to each item in queue.
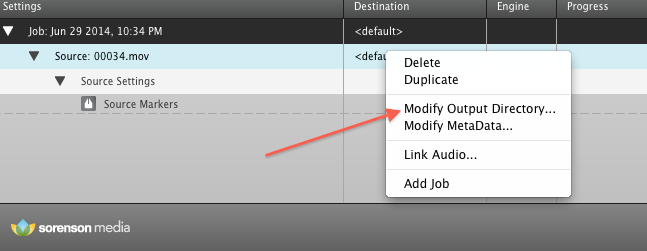
5. Destination folder, You destination by default is the same folder your files are in. if you want to change it, right click in Destination column and choose “Modify destination folder” and choose the folder you prefer for converted files. If you want to change destination folder for all your future conversions go to Preferences.

6. Squeeze it! If you do with separate files, you will see progress bar for each, if with “watch folder” – then it shows only for current clip.


No comments:
Post a Comment